
Cat eye nail polish is a magnetic polish that creates a thin, glowing line of light across the nail. As your hand moves, the line slides across each nail, and you shape it yourself with a small magnet. The meaning and purpose of this guide include discussing cat-eye nail polish, how to pick a good one, sixteen designs to try in 2026, six magnet techniques, a step-by-step application method for gel and air-dry polishes, and the common mistakes one usually makes with the first attempts, along with some safety tips most guides do not mention.
This guide is based on my experience with Cat Eye nail polish and some research on common procedures in the area and does not represent a product review. The final instructions reflect the standard patterns suggested by manufacturers of magnetic polishes and dermatologists’ advice on the use of gel manicure procedures.
Cat eye nail polish at a glance
| What it is | A manicure made with magnetic polish and a magnet |
| Difficulty | Beginner-friendly with a little practice |
| Polish types | Magnetic gel (needs a UV/LED lamp) or air-dry magnetic polish |
| Must-have tools | Magnetic polish, a nail magnet, base coat, top coat |
| Best base color | Dark or opaque colors make the shimmer stand out most |
| Biggest beginner mistake | Letting the polish set before the magnet has shaped it |
My personal experience with cat eye nail polish
When I first used cat-eye nail polish, I was quite taken aback by its beauty. I had come across a plethora of images and videos of cat-eye nails online, yet I didn’t expect them to look this good in real life. I love exploring different nail styles and couldn’t wait to find the reason for their popularity.
Why I chose soft pink
I opted for a soft pink cat-eye nail polish because I was looking for something elegant but not overtly. I figured it would be great for everyday wear but still give my nails something nice.
When I first used the polish, it seemed just like any other shimmery nail polish, but as soon as I brought my magnet close to my nail, I instantly noticed tiny metallic particles moving and making a beautiful pattern. This was definitely the best part of the whole process.
What was tricky at first
Getting the perfect cat eye effect took some practice. I wasn’t sure how close to hold the magnet or which angle would create the best design. Sometimes the shimmer line looked too wide, and other times it wasn’t as noticeable as I wanted.
I had to experiment with different magnet positions before I achieved a look I liked. It took a little patience, but I enjoyed learning how to create the effect.
How lighting changed the look
The change in my nail’s appearance because of the change in lighting struck me almost instantaneously. When I stepped into the sunlight, for example, my nails had that bright, shiny, magnetic sheen that seemed almost three-dimensional. When in the indoor area, the same nail polish looked softer and more classy.
I even found myself trying to move my hands as much as possible to see how the light plays on the pattern on my nails. Even though it is small, it was enough for me to find this manicure more exciting than usual.
Colors I’m curious to try next
After having experimented with a soft pink cat-eye nail polish color, I became intrigued by the other cat-eye nail polish colors too. I am interested, especially in deep burgundy, emerald green, and champagne colors.
Lighter cat-eye nail polish shall give a touch of softness and femininity, while darker colors accentuate the dramatic side of the effect provided by the magnetic powders. I started to think that cat-eye nail polish may be appropriate for both everyday manicures and special events.
No extra decoration needed
I also liked that there was no need for rhinestones, stickers, or complicated nail art for nails to look unique. The magnetic shimmer was already nice enough on its own.
I was also pleased that I could alter the design just by moving the magnet in any direction. I could try out more diagonal or velvety effects every time rather than using just the same horizontal line.
What I learned along the way
The process wasn’t completely perfect. I learned that working on one nail at a time made it easier to control the magnetic effect before curing the gel polish. Taking my time also helped me create a more even design, and rushing sometimes left me with a pattern that didn’t look quite right.
With practice, I started feeling more confident about creating the look I wanted.
What I love most
The main reason I enjoy using cat eye nail polish is due to its tendency to make a basic manicure appear more elegant. The shiny effect brings the beauty of my nails even when I’m just wearing simple casual outfits. Although the polish looks slight from some distance, it has a shiny effect and interesting patterns when the light shines on it.
To summarize my experience with cat eye nail polish, I’ve learned that it is very enjoyable and interesting. I love the fact that I can play around with tones, magnetic patterns, and finishes without any special nail art technique. I highly recommended it to other people who like stylish nails combined with some sparkle.
What is cat eye nail polish and how does it work?
Cat-eye nail polish is a type of polish that produces a distinct line across the nail, just like a cat’s eye. The effect of cat-eye polish is caused by tiny metal particles which are present in the polish formula.
While the polish is wet, a magnet is used to pull the tiny metal particles towards itself to create a pattern on the nail. The metal particles are going to reflect the light differently than the other particles in the polish. After drying, the result of the nail polish application is fixed.
The design of the cat eye polish is determined by the placement of the magnet; for instance, placing the magnet flat over the nail makes a glow effect, while placing it vertically creates a line effect.
Cat eye nail polish vs. regular nail polish
- Regular polish gives a flat color, a shimmer or glitter.
- Cat eye (magnetic) polish has particles that move under a magnet, so you can shape a pattern.
- Gel versions stay liquid until you cure them under a UV or LED lamp. That gives you time to shape the pattern.
- Air-dry versions need no lamp but start to set quickly, so you must work fast.
The terms “cat eye” and “magnetic” polish are mostly used for the same thing. Some brands use “cat eye” for the sharp line and “magnetic” for any polish that reacts to a magnet.
16 cat eye nail designs to try in 2026
The styles below lean in two directions that suit 2026 wardrobes: soft, close-to-skin finishes and deep jewel tones. Each one lists the base, the magnet position and who it suits. Pick one that fits your nail length and your occasion.
Classic and dark designs
- Black and silver single line. Magnetic polish in black or charcoal, with one straight silver line near the center. The easiest design to learn, and it suits every length.
- Burgundy velvet. A deep wine-red polish with the magnet held flat above the nail. You get a soft glow instead of a hard line, and it looks rich on short nails.
- Emerald green diagonal. A jewel-green polish with a diagonal line from the lower left to the upper right. A diagonal draws the eye along the nail, so it looks neat on short and square nails.
- Midnight blue galaxy. A navy base with a silver-blue line. Add a little fine glitter on the ring finger only, so the set stays elegant.
Soft and everyday designs
- Milky white with a silver line. Apply a sheer milky base first, then a light silver magnetic polish. A good choice for work and weddings.
- Nude with rose gold. A neutral base with a rose-gold magnetic top layer. The line is subtle, so it also hides regrowth well.
- Blush pink pearl. A pale pink magnetic polish with a pearly shimmer. Use the velvet technique for a soft, glowing finish.
- Sheer jelly base with a gold line. A translucent colored jelly base lets the gold line look as if it floats inside the nail.
Statement designs
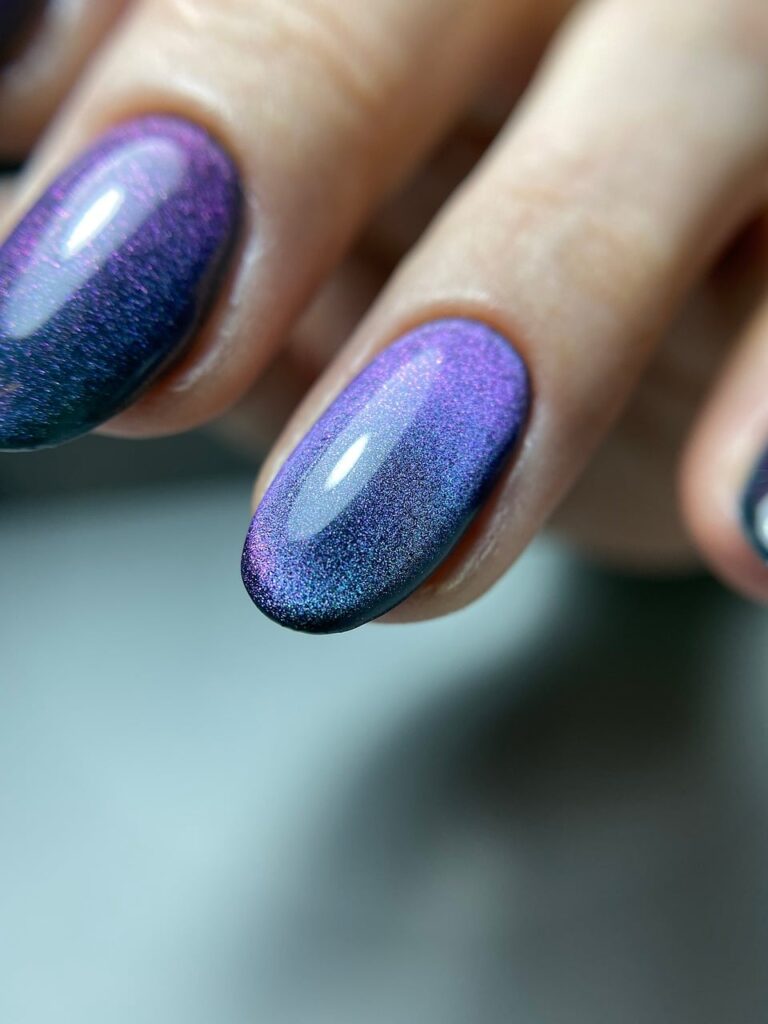
- Purple to violet ombré. Two magnetic shades blended where they meet, with the magnet placed over the blend line.
- Double cat eye. Two parallel lines in two colors, such as silver and copper. Use a two-bar magnet or two thin layers.
- Chevron (V-shape) cat eye. Move the magnet in a small V motion so the line curves toward the tip. Practice this one on a spare tip first.
- Cat eye French tip. Hold the magnet near the free edge so the shimmer follows the curve of the tip.
- Accent nail. Keep four nails in a plain color and make one cat eye nail, usually the ring finger. Less work and very wearable.
- Negative-space cat eye. Leave a clear gap near the cuticle and put the shimmer only on the tip half.
- Cat eye with gold foil flakes. After curing the magnetic layer, add a few tiny foil flakes on a tacky layer and seal with top coat.
- Chrome-edge cat eye. Add a thin line of chrome powder along the sidewall to frame the magnetic shimmer.
Choosing quickly: beginners should start with design 1, 2 or 13. For short nails, try 2, 3 or 6. For events, try 9, 10 or 15.
The look I chose: I tried a soft pink cat eye nail polish because I wanted something elegant but not too bold. If you want a similar mood, design 7 (blush pink pearl) is a good place to start. I haven’t tried them yet, but I’m also curious about deep burgundy and emerald green, which you’ll find in designs 2 and 3.
6 magnet techniques and what each one does
The angle and distance of the magnet matter more than the polish brand. Learn these six patterns and you can make nearly every design above.
| Technique | How to hold the magnet | Result |
|---|---|---|
| Straight line | Parallel to the nail, close to one side | A sharp line across the nail |
| Diagonal | Tilted at about 45° | A slanted line; flattering on most nails |
| Curved or chevron | Move slightly as you hold it | A curved or V-shaped line |
| Velvet | Flat above the surface | A soft, even glow with no line |
| Double line | A two-bar magnet, or two thin layers | Two parallel lines |
| Tip-focused | Near the free edge | Shimmer concentrated at the tip |
Tips that make the pattern sharper:
- Position the magnet near the nail polish, but make sure they aren’t touching. A gap that’s a few millimeters is a good starting distance.
- Stay in the position according to the amount of time specified by the brand you use. Brands suggest to hold the magnet in the same position for about 5 to 30 seconds.
- Make sure that you place the magnet on each finger at the same angle for the best results.
- You should make a mark on the stronger side of the magnet using tape.
- Placing the line further away from the base of the nail gives the illusion of length, whereas a line closer to the center makes it appear more striking.
- Ensure that the magnet is clean after every use, because the transfer of polish can mess up the pattern.
What I noticed with the magnet: at first I wasn’t sure how close to hold the magnet or which angle was best. Sometimes the shimmer line looked too wide, and other times it wasn’t noticeable enough. Trying different positions fixed it, and I also enjoyed experimenting with diagonal patterns and softer, velvet-like effects.
How to apply cat eye nail polish at home: step-by-step
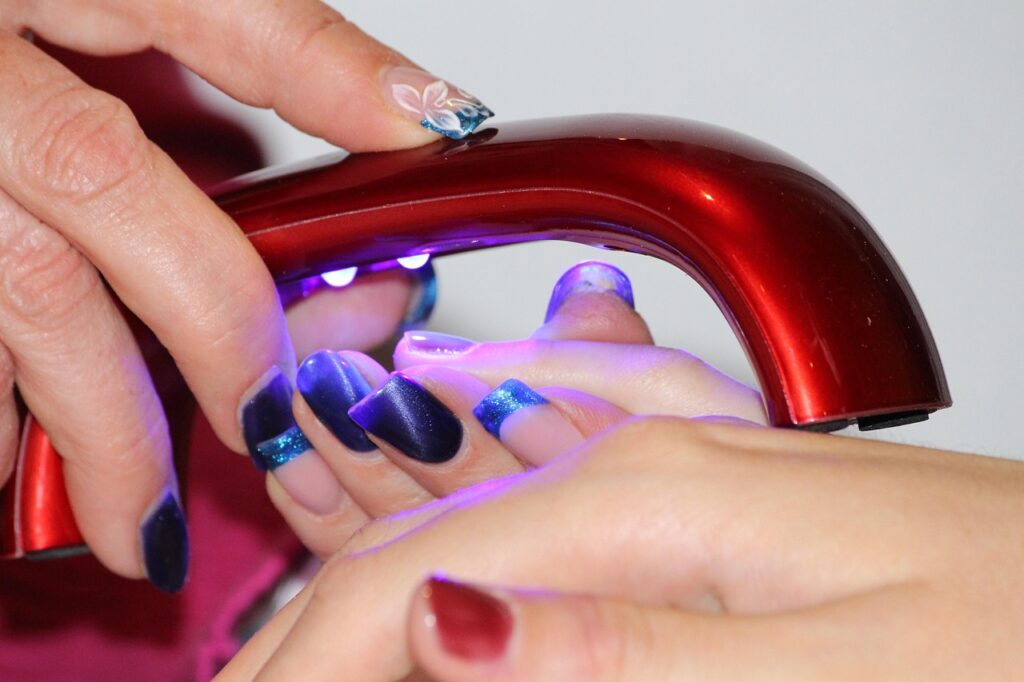
These steps are written for magnetic gel polish. For air-dry polish, skip the lamp and do the magnet step while the polish is wet.
You need: a nail file, a light buffer, a cuticle pusher, nail cleanser and lint-free wipes, base coat, magnetic polish, a nail magnet, top coat, and a UV/LED lamp for gel.
- Prepare the nails. Gently push back the cuticles, shape the nails with a file and lightly buff the surface. Do not over-buff, because it thins the natural nail.
- Clean. Wipe each nail with cleanser on a lint-free wipe to remove dust and oils.
- Apply base coat. Brush it along the free edge (the tip) to seal it, and cure it if you use gel.
- Add a color base (optional). Dark or opaque colors make the line brighter. Cure it if you use gel.
- Apply one thin layer of magnetic polish. Do one nail at a time. A thick layer moves badly and cures unevenly.
- Shape the pattern. Hold the magnet close to the wet polish in the position you want, and hold still.
- Cure with the magnet in place. Most brands say to cure while the magnet is held in position, or to flash-cure for a few seconds first. Follow your bottle’s instructions. If you move your hand before the polish sets, the line will blur.
- Add a second thin layer (optional). Repeat steps 6 and 7 for more depth.
- Seal with top coat. A non-wipe top coat usually keeps the effect sharp. Cure it.
- Moisturize. Finish with cuticle oil and hand cream.
Air-dry polish: after the base coat, apply one coat of magnetic polish, shape it with the magnet right away, and keep still until it is no longer wet. Then add a quick-dry top coat.
Beginner’s guide: how to get it right the first time
- Start with one hand and one color. Learn the straight line before you try other patterns.
- Choose a dark base. It makes small mistakes harder to see.
- Use gel if you can. Gel stays liquid until cured, so you have time to shape the pattern. Air-dry polish gives you less time.
- Work one nail at a time. Apply, shape and cure each nail before moving on.
- Do the thumb last. It is the hardest to position, and the other fingers will show you the best angle first.
- Practice on a spare tip. A stick-on tip fixed to a lid or a piece of putty lets you rehearse the magnet position.
- Expect an uneven first set. Most people improve a lot by the second manicure.
From my own try: working on one nail at a time made it easier to control the magnetic effect before curing the gel polish. Taking my time gave me a more even design, while rushing sometimes left a pattern that didn’t look right.
8 common cat eye mistakes and how to fix them
| Mistake | Why it happens | Fix |
|---|---|---|
| Weak, blurry line | Magnet too far away, or it moved | Move closer and hold still |
| Magnet sticks to the polish | It touched the surface | Keep a small gap |
| Pattern lost after curing | The hand or magnet moved during curing | Hold still until cured |
| Patchy shimmer | Polish applied too thick or unevenly | Use thin layers |
| Line in the wrong direction | Magnet turned the wrong way | Mark the magnet and keep one angle |
| Dull finish | Wrong top coat, or the top coat was wiped | Use a non-wipe top coat |
| Lifting or peeling | Poor prep or oil on the nail | Clean well and seal the free edge |
| Polish set too early | Took too long to shape | Work one nail at a time |
Best nail shapes for cat eye nails
| Shape | Why it works |
|---|---|
| Almond | Curved sides frame a diagonal line well |
| Oval | A soft look that suits the velvet effect |
| Short square or squoval | Practical, with a flat area that shows a sharp line |
| Coffin or ballerina | A long, flat surface shows the line clearly |
| Stiletto | Dramatic, but the narrow tip leaves less room for patterns |
Short nails still show the effect. Use a diagonal line or the velvet technique so the shimmer reads clearly on a small area.
How to choose good cat eye nail polish: what to check before you buy
You can judge a magnetic polish before you buy it by checking these points on the product page and in buyers’ photos:
- Type. Gel or air-dry, and whether your lamp suits it.
- Magnet included. Some kits include one, and others sell it separately.
- Working time. Look for brands that say how long you can shape the pattern before it sets.
- Pigment. Photos should show full color in one or two thin coats.
- Line sharpness. Look at real customers’ photos, not only the brand’s own images.
- Wear and removal. Check how long it lasts and whether it soaks off.
- Ingredient information. Choose brands that list ingredients and safety warnings clearly.
- Bottle size and price. The most expensive polish is not always the best. Compare size, kit contents and reviews.
Nail safety basics
- Conduct a patch test before using new products. Allergies may occur with the use of gel polish, and the symptoms may include reddening, itching, swelling, and blistering.
- Refrain from peeling a gel. Peeling pulls away layers of the natural nail. Follow the manufacturer’s instructions for soaking using acetone.
- Protect the skin from the UV light. There is a risk resulting from the use of UV light, although it is negligible at times.
- Be careful with cuticles. Do not cut the cuticle.
- Ensure proper ventilation. Work in a room that is properly ventilated and ensure that the eyes are kept safe.
- Exercise caution with magnets. Nail magnets are small magnetic devices that can be swallowed by kids.
- Know when to get help. Persistent pain, discoloration or lifting of the nail from the nail bed should be checked by a doctor or dermatologist.
Further reading: the American Academy of Dermatology (aad.org) has guidance on gel manicures, UV lamps and nail care. The U.S. Food and Drug Administration (fda.gov) has information on nail care product safety. The American Contact Dermatitis Society (contactderm.org) covers acrylate allergy.
Frequently asked questions
What is cat eye nail polish? Cat eye nail polish is a magnetic nail polish with tiny metallic particles in it. When you hold a magnet close to the wet polish, the particles move and form a glowing line that looks like a cat’s eye.
Do I need a magnet for cat eye polish? Yes, for the cat eye effect. Without a magnet, the polish looks like a metallic or glittery color with no pattern.
Can I use any magnet? Often yes, but some brands recommend their own. A bar magnet usually gives a sharper line, and a flat or round magnet suits velvet effects. Check the product page.
Do I need a UV lamp? Only for gel versions. Air-dry magnetic polish needs no lamp, but it sets quickly, so you have to work fast.
Why is my cat eye line blurry? The most common causes are a magnet that is too far away, a hand that moved while holding it, or polish that was applied too thickly.
How long does a cat eye manicure last? It depends on the product, how well you prepare the nails and how you use your hands. Gel generally lasts longer than air-dry polish.
Does cat eye polish work on short nails? Yes. A diagonal line or the velvet technique makes the most of a small area.
Can I apply cat eye polish over regular polish? Yes, but dark and opaque bases make the effect look stronger.
How do I remove it? Gel formulas need a soak-off removal. Air-dry polish comes off with regular remover.
Conclusion
Cat Eye nails look stunning, yet the whole process is rather simple: thin application of polish, steady magnet movement, and a clean nail bed. Begin with one color and an ordinary For now, your task is to practice with one design moving forward.
Choose one design from the list above, gather all necessary equipment, and practice with one hand. Once you have mastered the design, the rest will depend on changing the position of the magnet.
In my experience, cat eye nail polish is a great solution among other types of nail polish for those who want something impressive without a complicated design.
About this guide
This article is based on personal experience testing soft pink cat eye nail polish and research on manufacturer instructions and information provided by dermatology groups. This is informational material and not advice on medical matters. Go to a doctor in case you have any nail or skin issues.

Modern Lifestyle Center is a fashion and beauty publication sharing the latest trends, beauty tips, nail art inspiration, personal styling, and lifestyle ideas. Our mission is to provide helpful, trustworthy, and inspiring content that enhances everyday beauty and personal style.